Digital Delft Blue
This is a big one, teaching a robot to paint Delft Blue. All the necessary introductions and results can be admired in the video, wonderfully edited by yours truly, down below.
Working in a team of 5 we all had our parts to play. I focused mainly on designing custom parts for the robot arm. Magnetic brush holders for easy replacements, an automated stirring setup holding six, different concentrations of paint at once and experimentation with a modified drag knife setup and reservoir brushes.
Good fun it was, All ideas were welcomed without emotional scrutiny and analyzed logically on their strengths. This made it a very positive group to work with. A problem would come up and we’d just have to find a way. No rules, just do the best job you can with the given tools. Freedom baby!

3 Minute Video Summary
So I was considering to add heaps of explanation on the iterative steps taken for the different creations involved here. But ain't no one gonna read those. So just take it from me, many iterations. You'll get the questionable nicely packaged rundown.
Cobalt paint stirring setup


Six cups stirred at once, powered by a single motor unified through the magic of gears. Motor has gearbox to both lower the RPM’s and increase torque. Spins at 200 RPM, within the measured acceptable range to stop the magnetic stirring rods from getting so dizzy that their now delusional anthropomorphically created minds decide that they were supposed to be a helicopter all along and take off.
The motor supplies power to the inner cog that transfers power to six smaller gears with a gear ratio of about 2.13. So the actual speed at which the paint is stirred lays around 420 RPM (wonderful coincidence). The smaller gears are attached to 3d printed magnet holders that are aligned in such a way that a magnetic stirring rod placed above them obediently spin along with them.


The 3d printed cups that hold the paints and stirring rods are held in place by tightly fitting rings that are glued to the main setup. This way the cups can be removed and are always placed in the same location. This is important because the robot is “told” beforehand where the cups are relative to itself. Like I said, no feedback.
I designed the cups to be as small as possible to use as little paint as possible while still being wide enough for the stirring rods to spin properly. An added benefit of this is that the rotation of the rods can be disturbed by the brush without them falling out of alignment with their driving magnets.
When the brush is dipped into the paint an excess amount of paint still clings to the brush in the form of a small globule. In earlier experiments this would cause very thick initial lines to be painted, ruining the consistency of line work. To get around this problem in the simplest way possible I attached a circular slab of plastic to the top of the cup with a triangle shape cut out.
When the brush is saturated with paint it moves upwards into the point of the triangle. Touching the thicker part of the brush to plastic, discarding the extra paint and leaving the tip unmoved. This is essential because if the tip would bend, the first line formed afterwards will be off center making for.. well.. shitty paintings.


Some particular obstacles had to be overcome here. Normal paint be nicely homogenized and just chilling, but this shit... Small oxidized cobalt paint particles suspended in the water settle to the bottom the moment you stop stirring to blink your lazy eye. This inst a problem when you are a real person with the ability to directly interpret the results of your actions. Gives the ability to stir the paint yourself and make sure you don't flip out and catapult the contents of the wall next to you. Because our robot did not enjoy a direct feedback loop and we did not want to design and program one we had to come up with something a tad more... simplistic.
Brush Holder
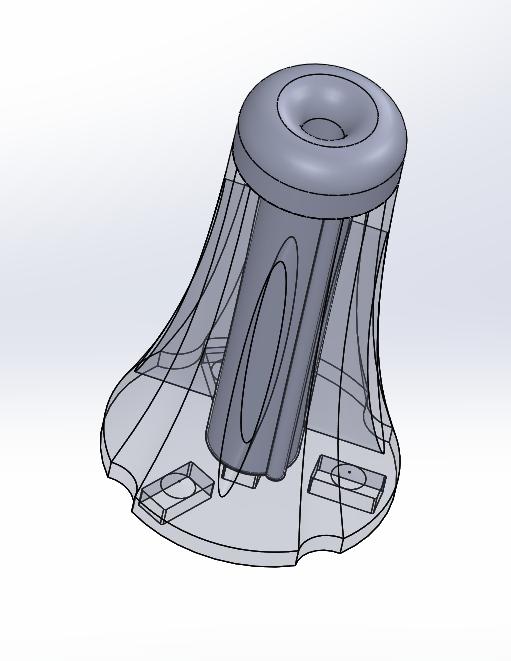
I split the brush holder up into a two-part system.
The first consisting of an outer casing that is used to hold an inner casing and to act as a safety mechanism if the robot hits something with the brush so the holder can still decouple without damaging its surroundings.
The inner part is designed to size for a specific brush so that it can be pressure fit inside of it. Has groove in the side so that in can only fit in the outer casing in a single way, like insect coitus.
It is held into the outer casing using a magnet so that it too can easily be removed, unlike insect coitus.


The brushes can be replaced in a fast and efficient way while still maintaining a level of accuracy required for our work.
